作者归档:zhouxiang
VUE element 封装的IM对话框组件
这个就直接存代码,说不定哪天用得着!
继续阅读
vue打包优化
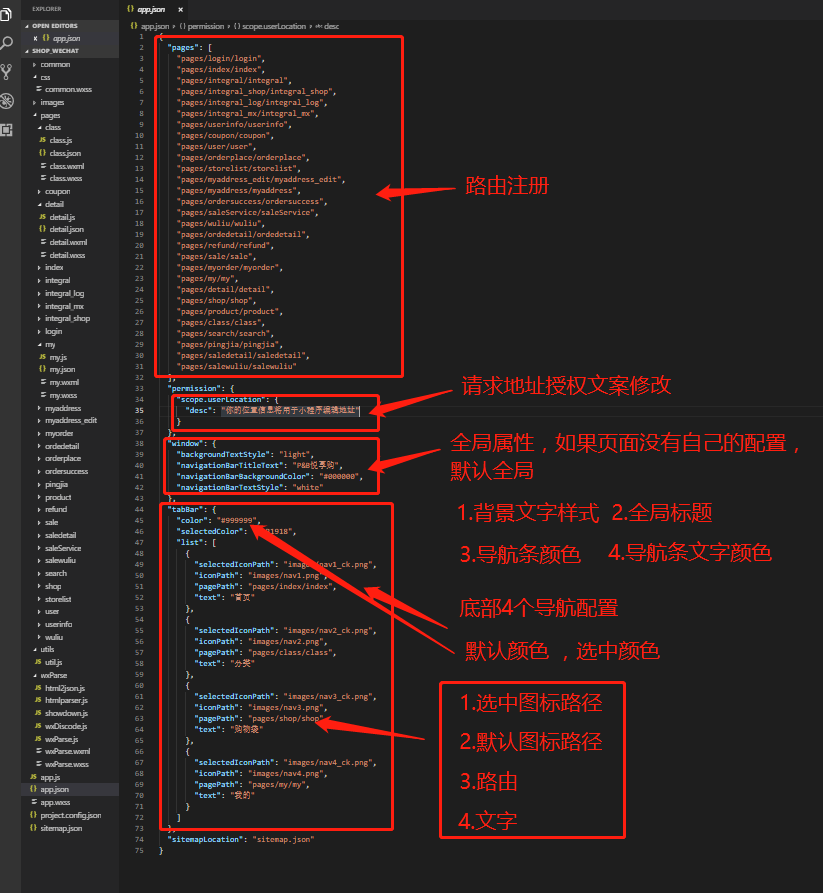
最近给公司,开发一个ERP项目,使用了VUE框架,这个项目前端是我独立负责,含500个VUE页面,60多组件,庞大的一批;
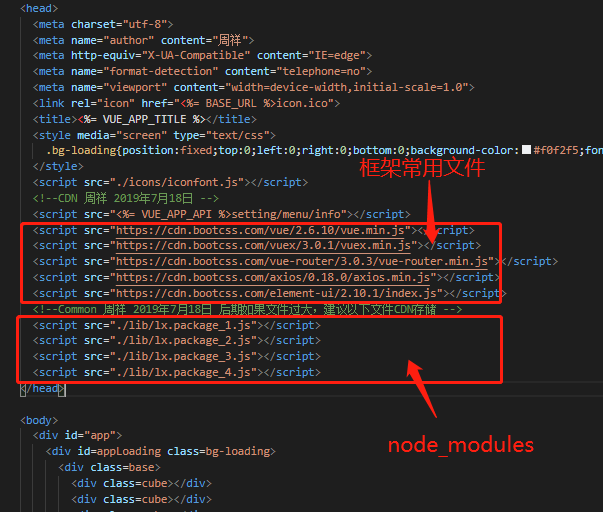
期间面临了许多问题,特别是打包这块,和代码CDN这块。平常打一个包需要30多分钟左右,完全受不了,后续就开始优化,下面将我优化的办法 介绍一下!
先看文档结构:
index.html:
继续阅读
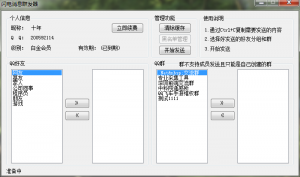
QQ消息群发工具

实际操作,根据QQ获取手机号
这种手段只适合学习交流,切不可获取他人隐私
适用范围:
1.知道对方QQ号
2.知道其他平台帐号(适用于所有手机号后2位有公布的平台)
以下我讲解如河根据QQ号和百度昵称获取手机号:
至于怎么查他人其他平台帐号信息,这个就不分享了,切记本文章只是为了给予各位提供一个网络安全意识,并不鼓励去窃取他人隐私!
具体实现,以下以百度帐号为例:
1.根据百度帐号找回密码。
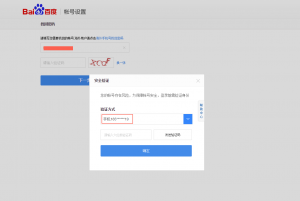
这样就得到手机前三位和后2位
2.通过号码生成工具,生成目的地区的 185开头的号段,存储在本地(比如:深圳 136开头的手机)
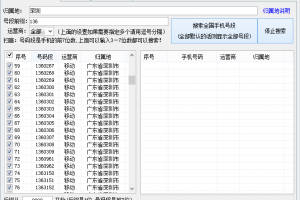
通过过滤后2位 ,这时候得到的号码 只有2000个左右
3.使用QQ同步导入进去
4.打开安卓模拟器,全恢复在模拟器上,登录你的QQ,开启手机通讯录匹配
5.这时候就可以看到那个人的QQ了,也确认了手机号
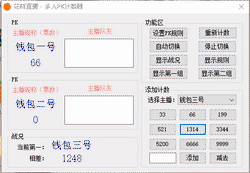
直播多人PK计数器,计数工具
直播多人pK计数器,计数工具,直播PK工具;
无聊,写了个PK计数器工具,方便网络主播进行计数与计算,工具未进行加壳加密,可以反编译查看源码,额!第一个版本弄的比较随便,有兴趣可以看一下
下载地址:多人PK计数器
屏蔽微信内部浏览器右上方分享按钮
function onBridgeReady() {
    WeixinJSBridge.call('hideOptionMenu');
}

if (typeof WeixinJSBridge == "undefined") {
    if (document.addEventListener) {
        document.addEventListener('WeixinJSBridgeReady', onBridgeReady, false);
    } else if (document.attachEvent) {
        document.attachEvent('WeixinJSBridgeReady', onBridgeReady);
        document.attachEvent('onWeixinJSBridgeReady', onBridgeReady);
    }
} else {
    onBridgeReady();
} nodejs 常用插件
使用会话:
1.安装express-session中间件
npm install express-session
2.安装cookie-parser中间件
npm install cookie-parser
3.注册后台(app.js)
var session = require('express-session');
var cookieParser = require('cookie-parser');
app.use(cookieParser());
app.use(session({
    secret: 'zhouxiangblog',
    resave: true,
    saveUninitialized: false
}));
4.写入session
req.session.userinfo = userinfo;
5.读取session
req.session.userinfo
GZIP压缩:
1.安装compression
npm install compression
2.在APP.JS里 var app = express(); 该位置下面 添加如下代码即可
var compression = require('compression');
app.use(compression());
这样就完成了nodejs开启GZIP压缩的功能
缓存:
1.安装memory-cache
npm install memory-cache
2.调用方法
var cache = require('memory-cache');// now just use the cachecache.put('foo', 'bar');
console.log(cache.get('foo'))// that wasn't too interesting, here's the good part
cache.put('houdini', 'disappear', 100) // Time in msconsole.log('Houdini will now ' + cache.get('houdini'));
setTimeout(function() {
    console.log('Houdini is ' + cache.get('houdini'));
}, 200);
nodejs 连接数据库
nodejs 创建项目
1.https://nodejs.org/en/download/ 下载nodejs 安装
2.npm安装express插件。
npm install express
3.安装express命令工具 npm install -g express-generator
3.express 安装nodejs项目。
express -e ejs MyApp
4.进入项目目录,安装nodejs依赖模块.
cd MyApp && npm install
5.安装代码修改自动重启
npm install -g nodemon
6.启动项目 cd MyApp 然后调用 nodemon server.js